A weak trickle where there should be a strong, steady stream is one of those daily frustrations that feels minor — until you’re standing under it every morning. Knowing how to fix a low-pressure shower head is a genuinely useful skill that can save you a service call, a chunk of money, and a lot of unnecessary annoyance. The good news? Most causes are surprisingly simple to address, even if you’ve never touched a plumbing fixture in your life.
Why shower pressure drops in the first place
Before reaching for a wrench, it helps to understand what’s actually causing the problem. Shower heads don’t lose pressure randomly — there’s almost always a specific reason behind it. The most common culprits fall into a few clear categories.
Mineral buildup is by far the leading cause in most households. Hard water deposits calcium and limescale inside the nozzles over time, gradually blocking the flow. This happens slowly enough that many people don’t notice until pressure has dropped significantly. A second common issue is a flow restrictor — a small plastic disc installed inside the shower head to limit water usage. While it serves an environmental purpose, it can reduce pressure to an uncomfortable level, especially in homes that already have moderate water pressure. Other possible causes include a partially closed water valve, a worn-out shower head that simply needs replacing, or a broader issue with your home’s water supply pressure.
Start with the simplest fix: cleaning the nozzles
Rubber nozzles — those small flexible dots on the face of the shower head — are designed to be massaged with your fingers to break up mineral deposits. Run the shower and rub each nozzle firmly. This takes about two minutes and sometimes solves the problem entirely.
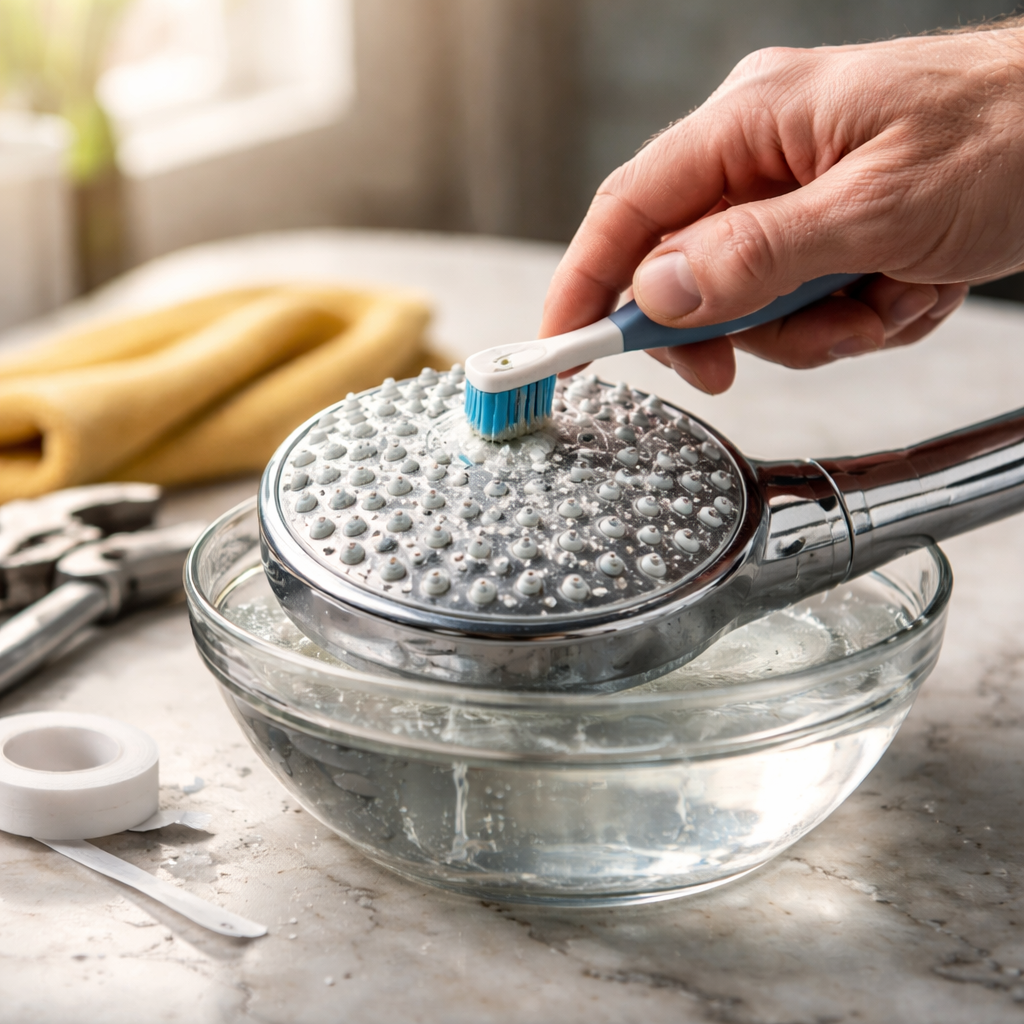
If that doesn’t do the trick, a deeper soak is the next step. Remove the shower head by unscrewing it counterclockwise from the arm (a cloth wrapped around it protects the finish). Place it in a bowl or bag filled with white vinegar and leave it to soak for several hours — overnight works best for heavy buildup. White vinegar is mildly acidic and dissolves limescale without damaging the fixture. After soaking, rinse thoroughly under running water and use an old toothbrush to clear any remaining debris from the nozzles and mesh filter.
White vinegar soaks are effective on most standard shower heads, but avoid using them on fixtures with decorative metallic coatings such as oil-rubbed bronze or brushed gold — the acid can damage the finish. In those cases, use a product specifically labeled as safe for that material.
Checking and adjusting the flow restrictor
Once the shower head is off, look inside the inlet — the part that connects to the pipe. You’ll likely see a small plastic disc with a hole in the center. That’s the flow restrictor. In many countries and U.S. states, shower heads are required to have them, but they’re generally legal to modify or remove in a residential setting for personal use.
Use a flat-head screwdriver or needle-nose pliers to carefully pry it out. Before discarding it, keep in mind that removing it will increase water consumption. A reasonable middle ground is to enlarge the central hole slightly with a drill bit rather than removing the disc entirely — this raises pressure while still limiting overall flow more than an unrestricted head would.
| Action | Pressure Effect | Water Usage |
|---|---|---|
| Clean nozzles only | Moderate improvement | No change |
| Soak in vinegar | Significant improvement | No change |
| Enlarge restrictor hole | Noticeable increase | Slight increase |
| Remove restrictor fully | Maximum increase | Higher usage |
| Replace shower head | Depends on model | Depends on model |
Check the shut-off valve and pipe connections
This step is easy to overlook. Somewhere along the water supply line to your shower — often near the main bathroom shutoff or behind an access panel — there may be a valve that was partially closed during a repair and never fully reopened. Turn it counterclockwise as far as it will go and test the shower again.
While you have the shower head off, also check the threaded connection at the shower arm for any debris, old tape residue, or minor corrosion that could be restricting flow. Wrap the threads with two or three layers of fresh plumber’s tape (PTFE tape) before reattaching — this ensures a watertight seal and prevents the kind of partial blockages that tape buildup can cause over time.
When to consider replacing the shower head entirely
If cleaning and adjustments don’t produce a meaningful improvement, the shower head itself may simply be worn out. Internal components degrade over years of use, and some budget models never delivered great pressure to begin with. Replacing a shower head is one of the most cost-effective bathroom upgrades available — decent models start at a modest price and installation takes under fifteen minutes with basic tools.
When choosing a new unit, look for models that specifically advertise high-pressure performance. These are engineered with smaller nozzle openings that concentrate water flow, producing stronger pressure even at lower supply volumes. Handheld models with adjustable settings give you additional flexibility.
A few things worth keeping in mind long-term
Preventing pressure loss is significantly easier than fixing it after the fact. A quick monthly rinse of the nozzles and an annual vinegar soak will keep mineral deposits from accumulating to the point of causing problems. If your area has particularly hard water, a whole-house water softener or a shower filter with a built-in scale inhibitor will extend the life of the fixture considerably.
Low shower pressure is rarely a sign of a serious plumbing issue — but if none of these steps help and other fixtures in your home are also running weak, that’s worth reporting to a licensed plumber. A pressure-reducing valve (PRV) on your main supply line may have failed or been set too low, and that’s a repair best handled by someone with the right tools and experience. For the vast majority of cases, though, an afternoon of simple maintenance is all it takes to get things flowing the way they should.