Most people assume that once plastic turns yellow, it’s done — time to throw it out. But that’s rarely true. Knowing how to fix a yellowed plastic surface can save you money, reduce waste, and restore items that still have years of use left in them. The discoloration you see isn’t damage in the traditional sense — it’s a chemical reaction happening inside the material itself, and in most cases, it can be reversed.
Why plastic yellows in the first place
Before reaching for any cleaning product, it helps to understand what’s actually going on. Most yellowed plastic — especially on older electronics, appliances, and outdoor furniture — has undergone a process called oxidation. UV radiation from sunlight breaks down the chemical stabilizers in the plastic, causing it to change color over time. Some manufacturers also added flame retardants called bromine compounds, which are particularly prone to this kind of yellowing when exposed to light and heat.
The result is that slightly orange-tinged, dull surface that looks grimy even right after cleaning. It’s not dirt. It’s a structural change in the upper layer of the material — which is precisely why soap and water never fix it.
What actually works: methods that deliver real results
There are several approaches depending on how severe the yellowing is and what kind of plastic you’re dealing with. Some methods are gentle enough for everyday household items; others are better suited for heavily discolored surfaces like retro gaming consoles or outdoor chairs.
Hydrogen peroxide and UV light
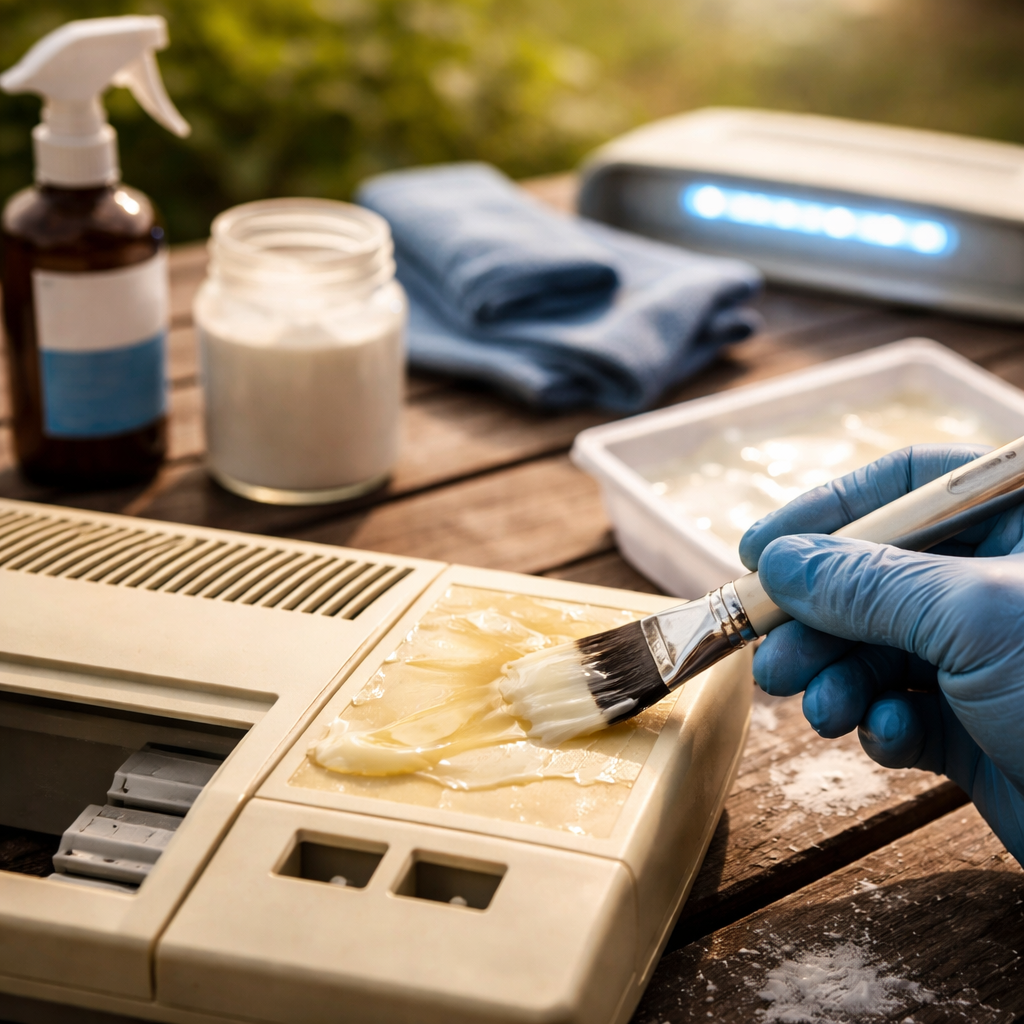
This is the most widely recognized method for restoring bromine-yellowed plastic, particularly for electronics. It’s often called the “Retr0bright” method, named after the open-source formula developed by retro computing enthusiasts.
The process uses hydrogen peroxide — typically a 3–12% concentration — activated by UV light (either sunlight or a UV lamp). The peroxide breaks down the oxidized compounds on the surface and essentially bleaches them back to their original tone.
| Hydrogen peroxide form | Best for | Notes |
|---|---|---|
| 3% liquid (pharmacy grade) | Light yellowing, small items | Apply with cloth or submerge if possible |
| Cream (salon developer, 6–12%) | Larger or oddly shaped surfaces | Stays in place better, won’t drip |
| Gel formulas | Vertical surfaces, detailed parts | Easier to control coverage |
Apply the peroxide evenly across the plastic surface, then expose it to UV light for several hours. Sunlight on a clear day works well. Keep the surface moist throughout — if it dries out, reapply. Once done, rinse thoroughly with clean water and allow it to dry completely.
Important: wear gloves throughout this process. Hydrogen peroxide in higher concentrations can irritate skin, and you don’t want it sitting on your hands while you work outdoors.
Baking soda paste for surface oxidation
For milder cases — think plastic containers, appliance panels, or bathroom fixtures — a paste made from baking soda and a small amount of water can make a noticeable difference. The mild abrasiveness lifts surface oxidation without scratching most plastics.
Apply the paste with a soft cloth, work it in using circular motions, let it sit for about ten minutes, then rinse off. It won’t reverse deep discoloration, but it can brighten a surface that’s only slightly yellowed and restore some of the original sheen.
Wet sanding for more stubborn cases
When the yellowing is confined to the very top layer and other methods haven’t worked, wet sanding is an option. This is a more hands-on approach that physically removes the discolored outer layer of plastic.
- Start with a fine-grit sandpaper — 400 to 600 grit is a reasonable starting point
- Keep the surface and sandpaper wet throughout the process
- Work in consistent, even strokes — avoid concentrating pressure in one spot
- Finish with progressively finer grits (up to 2000) to restore smoothness
- Buff with a plastic polish afterward to bring back the shine
This approach works well on thicker plastic items like outdoor furniture legs or car interior panels, but it’s not suitable for thin or flexible plastic where sanding through the material is a real risk.
A few things worth knowing before you start
Not all yellowed plastic responds the same way. ABS plastic — common in electronics — tends to respond very well to the peroxide method. Polypropylene and polyethylene (often used in containers and outdoor furniture) may need a different approach since they don’t always have the same bromine compounds causing the discoloration.
It’s also worth doing a small test patch before treating an entire surface. Pick a hidden area — the underside of a lid, the back corner of a panel — and test your chosen method there first. This way, if the plastic reacts unexpectedly (warps, loses texture, or lightens unevenly), you haven’t compromised the whole item.
Tip: after any restoration treatment, applying a UV-protective coating or plastic sealant can significantly slow down re-yellowing. It won’t prevent it indefinitely, but it gives you a much longer window before the surface starts to degrade again.
Keeping restored plastic looking good longer
Restoration is satisfying, but prevention makes the job easier next time around. Once you’ve brought a plastic surface back to its original color, a little ongoing care makes a significant difference.
- Keep plastic items out of direct sunlight when not in use — UV exposure is the primary cause of yellowing
- Wipe down surfaces regularly with a mild soap solution to prevent grime buildup that accelerates discoloration
- Use plastic-specific protectant sprays, particularly on outdoor items or anything that can’t be stored away from light
- Avoid harsh chemical cleaners containing bleach or ammonia — these can accelerate surface breakdown over time
It’s also worth noting that some plastics, particularly cheaper or older formulations, may re-yellow relatively quickly even after treatment. In those cases, regular light maintenance — a quick peroxide application once or twice a year — is more practical than trying to achieve a permanent fix in one session.
When the plastic is worth saving — and when it isn’t
Restoration makes sense when the plastic itself is still structurally sound — no cracks, brittleness, or significant warping. Yellowing alone is cosmetic. But if the plastic has become fragile, flakes when flexed, or shows signs of deeper degradation, no surface treatment will change its fundamental condition. In that case, replacement is the more practical path.
For everything else — vintage electronics, garden chairs, appliance housings, keyboard cases, storage containers — the methods above are genuinely effective. Yellowed plastic is one of the more fixable problems around the house, and once you’ve done it once, the process becomes surprisingly straightforward.