Most people assume that knowing how to fix a wall with a hole in the drywall requires professional skills or expensive tools — but the reality is quite different. Whether it’s a doorknob that swung too hard or an old anchor bolt that left a crater behind, drywall repair is one of those genuinely learnable home maintenance tasks that can save you both money and frustration.
Not All Holes Are Created Equal
Before grabbing any tools, it helps to understand what you’re actually dealing with. The repair method changes significantly depending on the size and type of damage, and using the wrong approach can leave you with a bigger mess than you started with.
Here’s a quick breakdown of the three main categories:
| Hole Size | Typical Cause | Repair Method |
|---|---|---|
| Up to 1/2 inch | Nail, screw, small hook | Spackling compound only |
| 1/2 inch to 4 inches | Doorknob, anchor bolt, accident | Mesh patch + joint compound |
| Over 4 inches | Impact damage, water damage | Drywall patch panel + tape |
Matching your method to the damage isn’t just about efficiency — it’s about making the repair actually hold over time and blend invisibly into the surrounding wall surface.
What You’ll Need Before You Start
One of the most common mistakes people make is starting the repair halfway through, only to realize they’re missing something critical. Gathering your materials first keeps the process smooth and stress-free.
- Spackling paste or lightweight joint compound (also called mud)
- Self-adhesive fiberglass mesh patch (for medium holes)
- A drywall saw or utility knife
- Putty knife or drywall knife (4-inch and 6-inch work well)
- Sandpaper — 120-grit and 220-grit
- Primer and matching wall paint
- A piece of drywall panel (for larger repairs)
- Drywall screws and a drill
- Wooden or metal furring strips for backing support
You don’t need all of these for every job — a tiny nail hole might only call for a tube of spackling and a finger. But for anything larger than a coin, having the right backing materials makes the difference between a repair that lasts and one that cracks within a few months.
Fixing Small Holes: Quicker Than You Think
For small holes left by nails, picture hangers, or thin screws, the process is genuinely simple. Clean any loose paper or debris from around the hole first — don’t skip this step, since compound won’t bond properly to torn paper edges that are peeling away.
Apply a small amount of spackling compound using your putty knife, pressing it firmly into the hole and then drawing the blade flat across the surface to scrape off the excess. Feathering the edges outward — blending the compound smoothly into the surrounding wall — is key to an invisible finish.
Let the compound dry completely before sanding. Rushing this step is the most common reason repairs look lumpy or uneven after painting.
Once dry, sand lightly with 220-grit sandpaper, prime the spot, and touch up with your wall paint. In many cases, this entire process takes under 30 minutes.
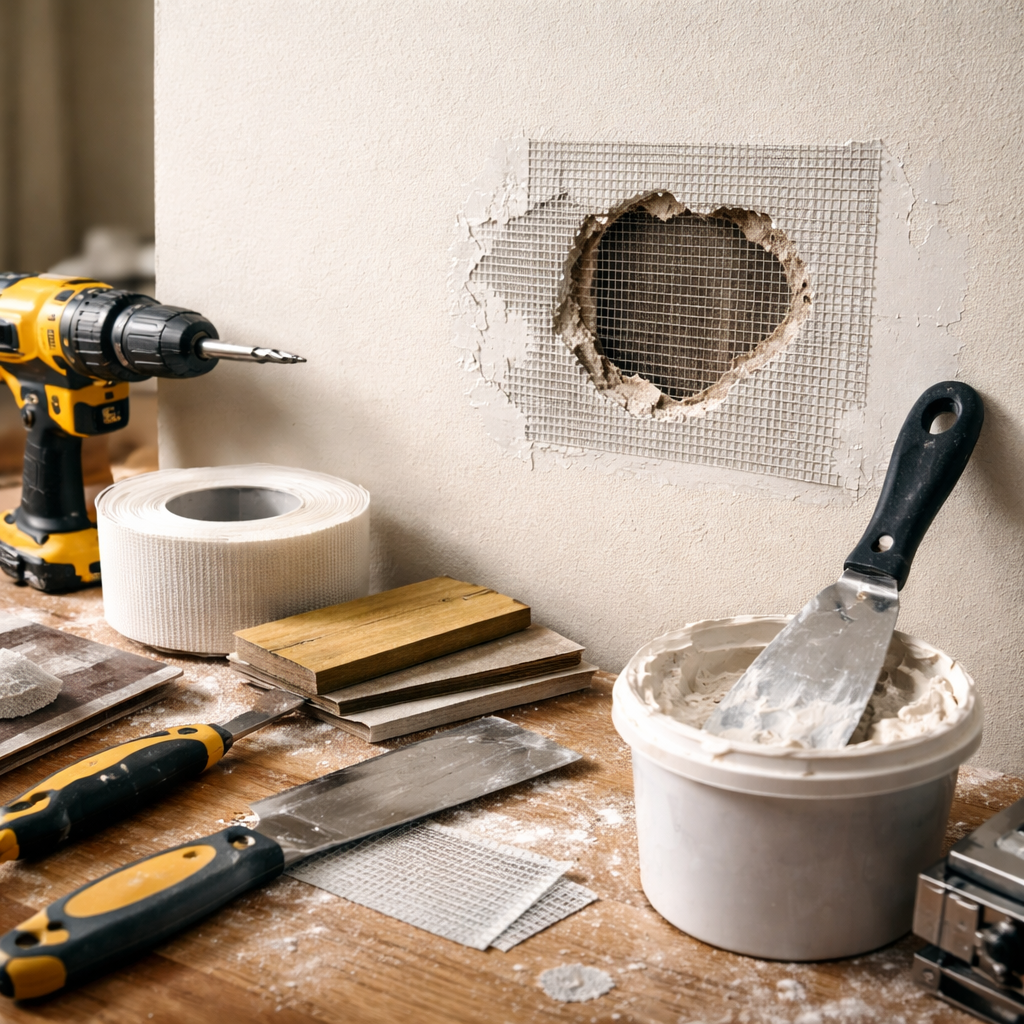
Medium Holes: The Mesh Patch Approach
Holes between roughly half an inch and four inches in diameter need a bit more structural support before you apply compound. Self-adhesive mesh patches handle this job well — they stick directly over the hole and give the joint compound something solid to grip onto.
After cleaning the damaged area, center the mesh patch over the hole and press it firmly against the wall. Then apply joint compound over the mesh with a 6-inch knife, working it into the mesh openings and spreading it outward in thin, even layers. Don’t try to fill the entire depression in one coat — two or three thin applications will always produce a smoother result than one thick one.
After your final coat is dry and sanded smooth with 120-grit and then 220-grit paper, wipe the area clean with a barely damp cloth to remove dust. Prime before painting — skipping primer over fresh compound almost always results in a dull, flat spot that’s visible even through paint.
Large Holes: The California Patch and the Backing Board Method
Larger damaged sections require an actual piece of drywall to fill the gap. There are two reliable approaches here, and both work well when done correctly.
The California patch (also called the peel-and-stick method) works for holes up to about six inches. Cut a square piece of drywall slightly larger than the hole. Score the back and snap it, then peel away the gypsum core while leaving a border of paper facing on one side. This paper flap becomes your bonding surface against the existing wall. Apply joint compound, press the patch in place, then skim over it with additional compound layers.
For anything larger, the backing board method is the more dependable choice. Cut the damaged area into a clean rectangle using a drywall saw. Cut two strips of wood or use metal backing clips to create support inside the wall cavity behind the opening. Screw the backing strips into place, then cut a new piece of drywall to fit the hole precisely. Screw it into the backing, apply drywall tape over the seams, and skim with joint compound in multiple thin coats.
- Always tape seams — untaped joints will crack as the wall flexes
- Sand seams flush before priming — even small ridges catch light and show through paint
- Use a wider knife for the outer feathering coats to blend the repair zone gradually into the existing surface
Painting to Match: The Step Most People Underestimate
Even a technically perfect drywall repair can look obvious if the paint isn’t applied correctly. The repaired area tends to absorb paint differently from the surrounding wall, especially if the existing paint has aged or has a texture to it.
Always prime the repaired spot first — ideally with a PVA drywall primer or a shellac-based spot primer for better adhesion and uniform sheen. Once the primer is dry, apply your topcoat. In many cases, you’ll need to roll or brush a slightly larger area than just the repair itself — blending paint in a gradual oval around the patch rather than painting only the exact spot helps prevent a visible “picture frame” effect where the new paint ends.
If your wall has texture — knockdown, orange peel, or skip trowel — replicate it before painting. Aerosol texture sprays are available at most hardware stores and can mimic common finishes reasonably well with a little practice.
When the Repair Is Done Right, You Won’t Know It Was Ever There
A well-executed drywall repair is genuinely invisible to the eye — no bump, no outline, no paint sheen difference. Getting there takes patience more than skill: letting each layer dry fully, sanding thoughtfully, and not rushing through the priming and painting steps. These aren’t difficult tasks, but they reward care and attention in a very satisfying way.
If you’ve never done this before, start with a small hole in a low-visibility area — a closet wall, a hallway corner — to get a feel for how the compound behaves and how long it takes to dry in your environment. By the time you move to the more prominent spots, the process will feel natural rather than nerve-wracking.