That small orange patch spreading under your car door or along a garden tool handle is not just a cosmetic problem — it is active metal deterioration that compounds every week you leave it alone. Knowing how to fix a rust spot on metal before it spreads is one of those practical skills that saves you money, preserves equipment, and extends the life of almost anything made of steel or iron.
Why rust spreads faster than most people expect
Rust forms when iron, oxygen, and moisture combine in a process called oxidation. What makes it tricky is that the corrosion does not stay on the surface. It travels beneath surrounding paint or coatings, undermining material that looks perfectly fine from the outside. By the time a rust spot becomes visible, the damage underneath is often already wider than what you see. That is why early intervention is so much more effective than waiting for the problem to grow obvious.
Temperature changes, road salt, scratches through protective coatings, and prolonged humidity exposure all accelerate the process. Metal that was treated carelessly during manufacturing or storage may develop surface oxidation within weeks. Understanding this gives you the right mindset going into the repair: thoroughness matters far more than speed.
What you will need before you start
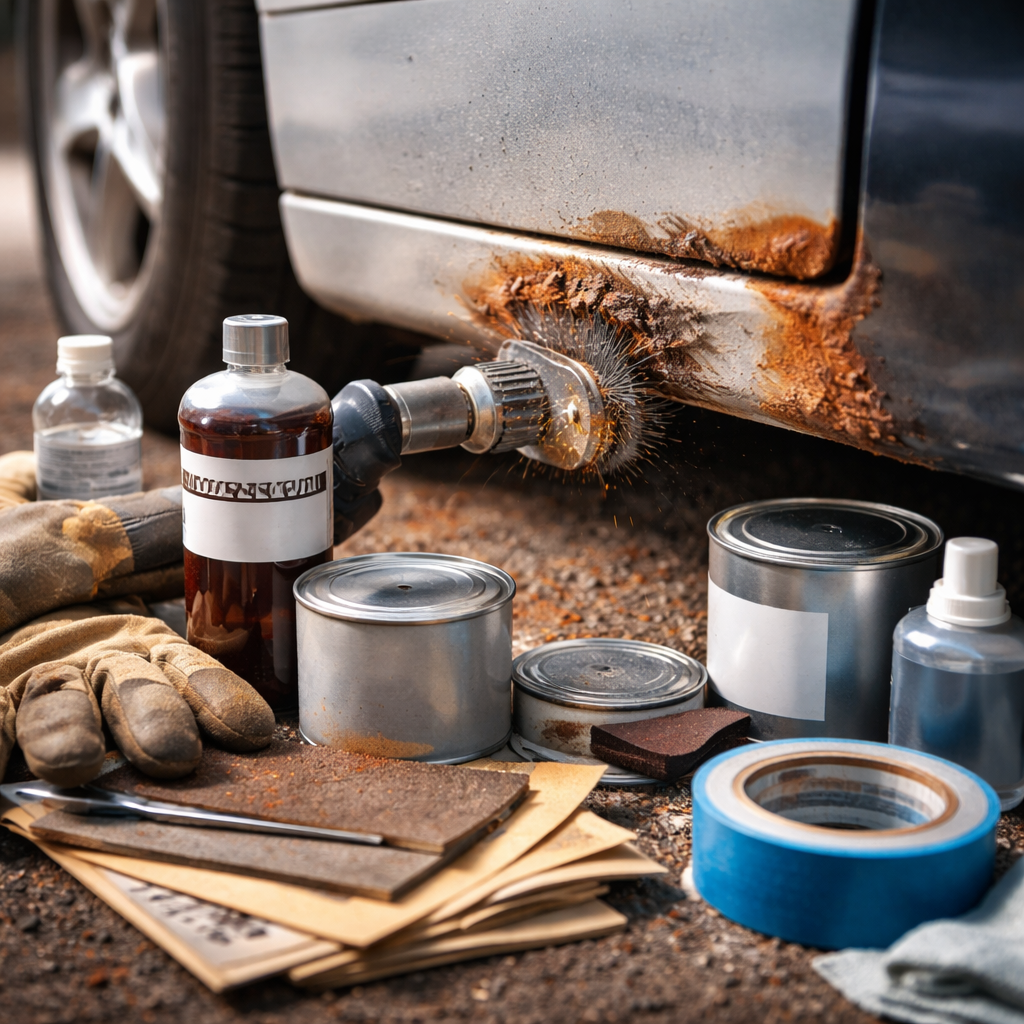
Gathering the right materials beforehand prevents mid-job interruptions and ensures a cleaner result. The specific products depend on the severity of corrosion and the surface you are working on, but most repairs share a common toolkit.
- Sandpaper in multiple grits (80, 150, and 320 work well for most repairs)
- Wire brush or wire wheel attachment for a drill
- Chemical rust converter or rust remover
- Metal primer suitable for bare steel
- Topcoat paint matched to the original surface finish
- Clean rags and isopropyl alcohol for surface degreasing
- Protective gloves and safety glasses
- Painter’s tape and masking paper if surrounding areas need protection
For small surface spots, you can sometimes skip the chemical converter and rely entirely on mechanical removal. For deeper rust that has pitted the metal, a chemical treatment is genuinely worth adding to the process.
Step-by-step: removing rust and preparing the surface
The repair process begins with removal — not painting over. Covering rust without eliminating it first is the single most common mistake people make, and it guarantees the problem returns within months.
Start by using a wire brush or coarse sandpaper to scrub away the loose rust and any flaking paint around the affected area. Work in circular motions and extend slightly beyond the visible rust, because the corrosion typically spreads under the surface. You want to reach clean, bare metal before moving forward.
Once the loose material is gone, switch to a finer grit to smooth the surface and feather the edges where old paint meets bare metal. This blending step is what separates a professional-looking repair from a patchy one.
If you can still see reddish or brownish discoloration after sanding, do not prime yet. Either sand more aggressively or apply a rust converter and let it fully react before continuing.
After mechanical removal, wipe the area thoroughly with isopropyl alcohol to remove dust, grease, and any remaining oxidation byproducts. This step is easy to skip but genuinely important — contamination under primer causes adhesion failure and future bubbling.
Using rust converter: when and how
Rust converter is a chemical product — typically based on phosphoric or tannic acid — that reacts with iron oxide and transforms it into a stable compound. This compound forms a dark, paintable layer rather than leaving raw, reactive metal exposed.
Apply it with a brush directly onto the sanded area, following the manufacturer’s drying time precisely. Most formulas require between 20 minutes and a few hours to fully cure. Do not rush this stage. The chemistry needs time to complete the reaction before you add any coating on top.
| Rust severity | Recommended approach | Approximate drying time before priming |
|---|---|---|
| Light surface discoloration | Sanding + degreasing only | 30 minutes after alcohol wipe |
| Moderate rust with slight pitting | Sanding + rust converter | 1–3 hours depending on product |
| Heavy rust, deep pitting | Wire wheel + converter + filler primer | Up to 24 hours, check product instructions |
Priming and painting for a durable finish
Primer is not optional — it is the layer that bonds the topcoat to bare metal and provides an additional barrier against moisture intrusion. Choose an etching primer or a direct-to-metal primer depending on whether you used a rust converter. Etching primers work particularly well on clean bare metal because their acidic formula slightly etches the surface for better adhesion.
Apply primer in thin, even coats and allow proper flash time between layers. Two thin coats consistently outperform one heavy coat in terms of adhesion and finish smoothness. Once fully cured, lightly sand with 320-grit paper to remove any texture or dust nibs before applying the topcoat.
Topcoat paint goes on last. Again, thin coats beat heavy ones. If you are repairing a small area on a larger object, feather the spray or brush strokes outward to help blend the new paint into the existing surface. After the final coat dries, a clear lacquer or protective wax adds an extra shield against future moisture and UV exposure.
Preventing rust from coming back
A repair done well can last for years, but only if you address the underlying conditions that caused the rust in the first place. A chip in the paint, a scratch from a tool, or inadequate original coating are all entry points that will eventually lead to oxidation again.
- Inspect metal surfaces regularly, especially after winter or rainy seasons
- Touch up paint chips and scratches as soon as they appear, not months later
- Apply a rust-inhibiting wax or coating to bare or exposed metal parts annually
- Store metal tools and equipment in dry conditions, ideally with a light coat of oil on bare surfaces
- Consider using rust-inhibiting primer for any future paint projects on metal
Small habits practiced consistently make a far bigger difference than a single intensive repair effort. Metal that is checked, cleaned, and touched up regularly rarely develops the deep corrosion that requires major intervention.
The repair is just the beginning
Fixing a rust spot correctly feels satisfying in a way that quick-fix solutions never do. When you take the time to remove corrosion properly, neutralize what remains, seal the surface, and protect the finish, you are not just covering a problem — you are genuinely solving it. The metal underneath gets a real second chance, and the result holds up through weather, use, and time. That kind of durability is worth the extra effort every single time.