Most vacuum cleaners lose suction not because they’re broken beyond repair, but because of something surprisingly simple hiding inside. If you’ve been trying to figure out how to fix a vacuum cleaner with no suction, the good news is that in the majority of cases, you don’t need a technician — just a bit of time and a methodical approach.
Start with the obvious: blockages are the number one culprit
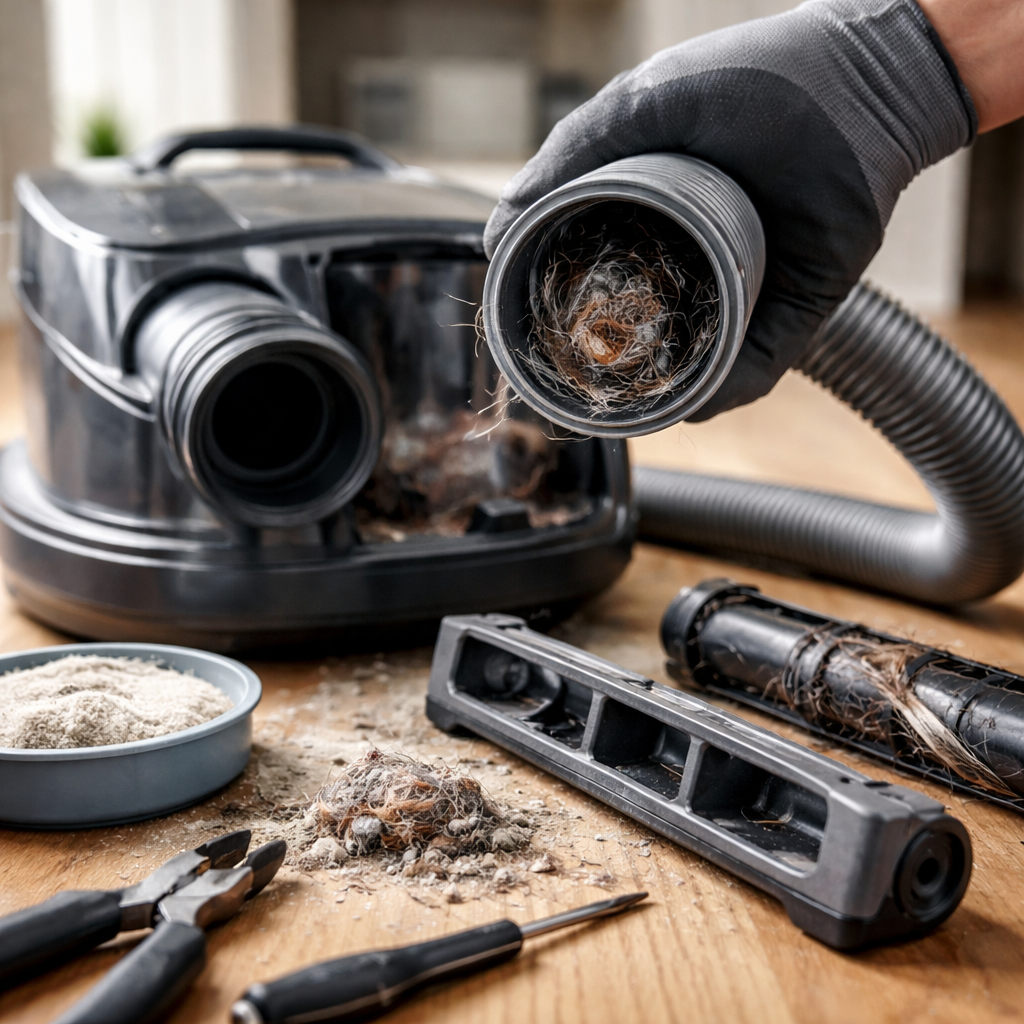
Before assuming the motor has given up or something internal has failed, work through the physical parts of the machine first. Clogs are responsible for a huge proportion of suction loss, and they can hide in places people rarely think to check.
Run your hand along the hose, detach it from the main body, and look through it toward a light source. If you can’t see clearly through the other end, there’s your problem. A broom handle or a long flexible brush can push obstructions out from either direction. The same logic applies to the wand, brush head attachment, and any curved connector pieces — debris compacts in bends and joints more than anywhere else.
- Check the main hose from both ends
- Inspect the connection points between hose and body
- Remove and clean the brush roll at the base of the unit
- Look inside the floor head itself — larger debris often gets stuck here
Filters matter more than most people realize
A dirty or clogged filter is one of the most overlooked reasons for weak vacuum suction. Most modern vacuums — whether bagless or bagged — use at least two filters: a pre-motor filter and a post-motor (exhaust) filter. When either becomes saturated with fine dust and particles, airflow is restricted, and suction drops noticeably.
A filter that looks slightly gray might still be holding back significant airflow. Tap it gently over a bin — if a cloud of fine dust appears, it needed cleaning long ago.
Foam and felt filters can usually be rinsed under cool running water. The critical step people skip: letting them dry completely before reinserting — ideally for 24 hours at room temperature. Putting a damp filter back causes its own airflow problems and can damage the motor over time. HEPA filters, depending on the model, are either washable or must be replaced entirely — check your manual for this specific detail.
| Filter type | Cleaning method | Replacement frequency |
|---|---|---|
| Foam pre-motor filter | Rinse with water, air dry 24h | Every 3–6 months |
| Felt filter | Tap out dust, rinse if washable | Every 6–12 months |
| HEPA filter | Check label — some are washable | Every 12 months or as directed |
The dust container or bag: an underestimated factor
For bagged vacuums, a bag that’s even two-thirds full can meaningfully reduce airflow. You don’t need to wait until it’s completely packed — replacing it when it reaches about half to two-thirds capacity keeps suction consistent and protects the motor from strain.
With bagless models, the canister itself needs more than just emptying. Fine dust coats the inner walls and the mesh separator over time. Washing the canister with warm water and a small amount of dish soap, then letting it dry fully, makes a real difference in how the machine performs afterward.
Checking for air leaks in the vacuum body
If you’ve cleared blockages and cleaned the filters but the vacuum still feels weak, air leaks are worth investigating. These occur when seals between components wear out or when the machine has taken a knock and internal parts no longer sit flush together.
Run your hand slowly around the hose connection points, the lid of the dust container, and any seams in the main body while the vacuum is running. A small rush of warm air escaping from an unexpected spot confirms a seal issue. Replacement gaskets and seals for popular vacuum models are widely available and inexpensive — they’re designed to be user-replaceable without specialist tools.
When the brush roll stops spinning properly
Reduced suction on carpets specifically — while performance on hard floors seems normal — often points to the brush roll rather than the suction system itself. Hair, thread, and fine fibers wind around the roll’s axle over time until it slows or stops rotating entirely. This doesn’t affect airflow directly, but it dramatically reduces the vacuum’s ability to lift debris from carpet fibers into the airstream.
Most brush rolls can be removed by releasing a few clips or screws on the underside of the floor head. Using a seam ripper or small scissors to cut through wrapped material — rather than pulling at it — prevents damage to the bristles. Some models also have a belt connecting the motor to the brush roll; a stretched or snapped belt will cause the roll to stop spinning even if everything else is working fine.
- Remove the brush roll and cut away wrapped hair and fiber
- Spin the roll by hand — it should rotate freely with no resistance
- Inspect the drive belt for cracks, stretching, or breakage
- Replacement belts are model-specific — have your vacuum’s model number ready before ordering
When none of the above solves it
If the suction remains poor after addressing filters, blockages, seals, and the brush roll, the issue is likely with the motor itself — either a loss of power due to wear, or a thermal cutout that has triggered and not fully reset. Many vacuums have built-in thermal protection that shuts the motor down if it overheats, often due to a blockage that has since been cleared.
In this case, switching the vacuum off, unplugging it, and leaving it for 30 to 45 minutes can allow the thermal cutout to reset on its own. If it powers back on normally after that cooling period, the motor itself is likely fine — the overheating was caused by the blockage, not by a fundamental motor fault.
Genuine motor failure is less common but does happen in older machines or those that have been regularly run in a restricted state. At that point, the decision comes down to the cost of a replacement motor versus the cost of a new vacuum — for higher-end models, motor replacement is often worth it; for budget units, replacement is usually the more practical path.
Keep it running well between fixes
The best part about understanding what causes suction loss is that most of it is preventable with a light maintenance routine. Emptying the canister or changing the bag regularly, tapping out the pre-motor filter every few weeks, and checking the brush roll for wrapped debris every couple of months keeps the machine operating the way it should — without the frustration of progressively weakening performance.
Vacuum cleaners are durable appliances when they’re maintained well. Most of what feels like a mechanical failure turns out to be accumulated neglect — and that’s something entirely within your control to reverse.