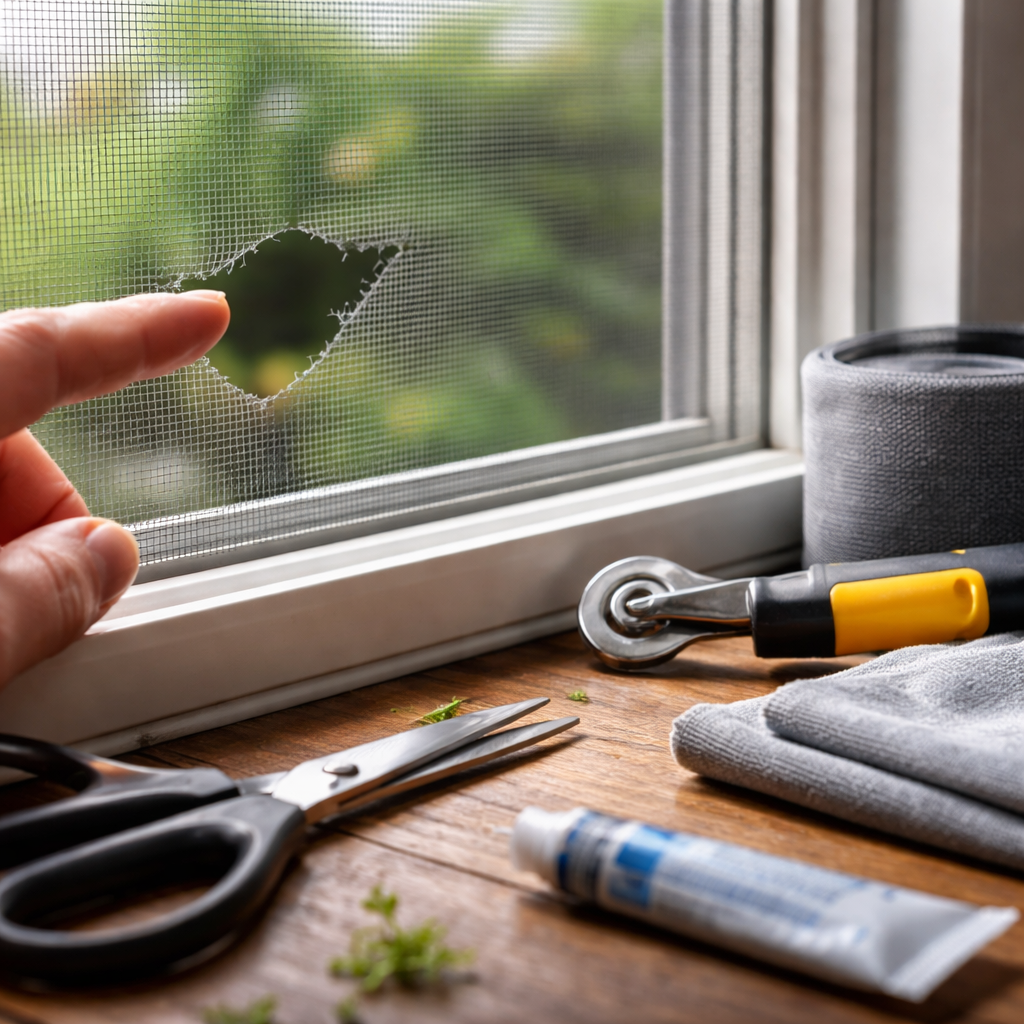
A small hole in your window screen might seem like a minor annoyance, but left unattended, it quickly becomes an open invitation for mosquitoes, flies, and debris. Knowing how to fix a torn window screen yourself can save you both time and money — and in most cases, it takes under an hour with basic tools you probably already have at home.
Assess the damage before you reach for the tools
Not every tear calls for the same solution. Before buying materials or dismantling anything, take a close look at what you are actually dealing with. Run your finger gently along the damaged area to understand the size and shape of the hole.
Here is a simple way to categorize the damage and decide your next step:
| Damage type | Size | Best approach |
|---|---|---|
| Small puncture or pinhole | Under 1 cm | Clear adhesive patch or nail polish |
| Medium tear | 1–5 cm | Mesh patch kit |
| Large rip or multiple tears | Over 5 cm | Full screen replacement |
| Frayed or loose edges | Any size | Re-spline or full replacement |
Once you know the scale of the problem, gathering the right materials becomes straightforward and you avoid buying things you do not need.
What you will need depending on the repair method
Window screen repair generally falls into two categories: patching and full replacement. Each requires a slightly different set of supplies, but none of them are difficult to find at a hardware store.
For patching small to medium tears:
- Fiberglass or aluminum mesh patch (sold in pre-cut kits)
- Scissors
- Clear waterproof adhesive or screen repair glue
- A clean cloth for wiping the surface
For a full screen replacement:
- Roll of replacement screen mesh (fiberglass is easier for beginners)
- Spline roller tool
- New rubber spline
- Utility knife or razor blade
- Flat-head screwdriver
Patching a small tear step by step
If the hole is small enough that a patch will do the job, the process is genuinely simple. Clean the area around the tear with a damp cloth and let it dry completely — adhesive does not bond well to dusty or wet surfaces.
Cut your mesh patch so that it extends at least 2 cm beyond the tear on all sides. Apply a thin, even layer of screen repair adhesive around the edges of the patch, then press it firmly onto the screen. Smooth out any air bubbles from the center outward using your fingertip.
For very tiny pinholes, a dab of clear nail polish applied in two or three thin layers works surprisingly well and blends into the mesh almost invisibly.
Allow the adhesive to cure fully before reinstalling the screen — check the product instructions for drying time, but most require at least a few hours.
How to replace the entire screen mesh
When the damage is too extensive for a patch, replacing the mesh entirely is the smarter move. It sounds more involved, but the process is logical and satisfying once you understand it.
Start by removing the screen frame from the window. Most frames pop out by pressing gently on the tabs or lifting at the corners. Lay it flat on a stable surface like a workbench or a table covered with a towel.
Use a flat-head screwdriver to pry out the rubber spline — the thin cord that runs around the groove and holds the mesh in place. Work carefully to avoid bending the frame. Once the spline is out, the old mesh lifts away easily.
Now lay your new mesh over the frame, leaving a couple of centimeters of overlap on each side. Starting at one corner, use the convex wheel of the spline roller to press the new spline into the groove, pushing the mesh in as you go. Work one side at a time, pulling the mesh taut but not so tight that it warps the frame.
When all four sides are done, trim the excess mesh with a utility knife held at a slight outward angle — this gives a cleaner edge and reduces fraying.
Common mistakes that make the job harder than it needs to be
Even a straightforward repair can go sideways when certain habits get in the way. Being aware of them beforehand saves frustration.
- Skipping the cleaning step — dirt and grease prevent patches from bonding properly
- Using the wrong spline size — if it is too thin, it will not hold; too thick and it will not fit the groove
- Pulling the mesh unevenly — this creates ripples and loose spots that let insects through
- Rushing the adhesive cure time — the patch may peel off at the first sign of rain or wind
- Cutting the new mesh before installing the spline — always install first, then trim
Choosing the right mesh material for your situation
Screen mesh comes in several materials, and the choice matters more than most people expect. Standard fiberglass mesh is the most common option for general household use — it is affordable, flexible, and does not corrode. Aluminum mesh offers more rigidity and holds up better against pets or accidental impacts, though it can oxidize over time in humid climates.
There are also specialty options worth knowing about. Solar screen mesh blocks a portion of UV light and reduces heat transfer, making it useful for sun-facing windows. Pet-resistant screen is woven from heavier fiberglass strands and can withstand scratching that would tear ordinary mesh within days.
If you live in an area with very fine insects like no-see-ums or gnats, look for fine-mesh options with a higher thread count per square inch — these are specifically designed to block smaller pests while still allowing airflow.
When a DIY repair genuinely makes sense — and when it does not
Fixing a screen yourself is almost always worth attempting if the frame is intact and the damage is localized. The materials are inexpensive, the skills involved are accessible to anyone with patience, and the result is typically just as good as a professional repair for standard residential screens.
That said, there are situations where calling a professional or ordering a custom replacement frame is the better call. If the frame itself is bent or warped, no amount of careful patching will produce a clean result — the screen will not sit properly in the window and air gaps will remain. Similarly, if the frame is a non-standard size or made from an older material that is difficult to source, a specialist will have access to options that are simply not available at a typical hardware store.
The good news is that most window screens in homes fall into the category of completely fixable with a basic patch kit or a single roll of mesh. Once you have done it once, the second repair takes half the time — and you will likely find yourself checking every screen in the house with new confidence.